
Using a custom DNS for better security and privacy
Do you use a custom DNS? Today, I'm going to show you around NextDNS, and show you how it might increase your security in a few simple clicks.

I think that we have to be careful more than ever to the places we go to online. Like seriously.
Threats are constantly evolving, and I want to show you all how to use NextDNS, a free DNS service which you can put on all your devices (bearing in mind that you'll be limited to 300,000 requests a month unless you fork up £1.79/mo for unlimited requests).
Step 1: Create an account (or don't create one)
To start, let's create ourselves an account. Well, if you don't want to do that, you can try it for 7 days without creating a free account.
Head over to nextdns.io in a web browser and click 'Try it now' if you're not prepared to sign up, otherwise, if you are prepared to sign up, click the button for my.nextdns.io and sign up on that page and follow the instructions.
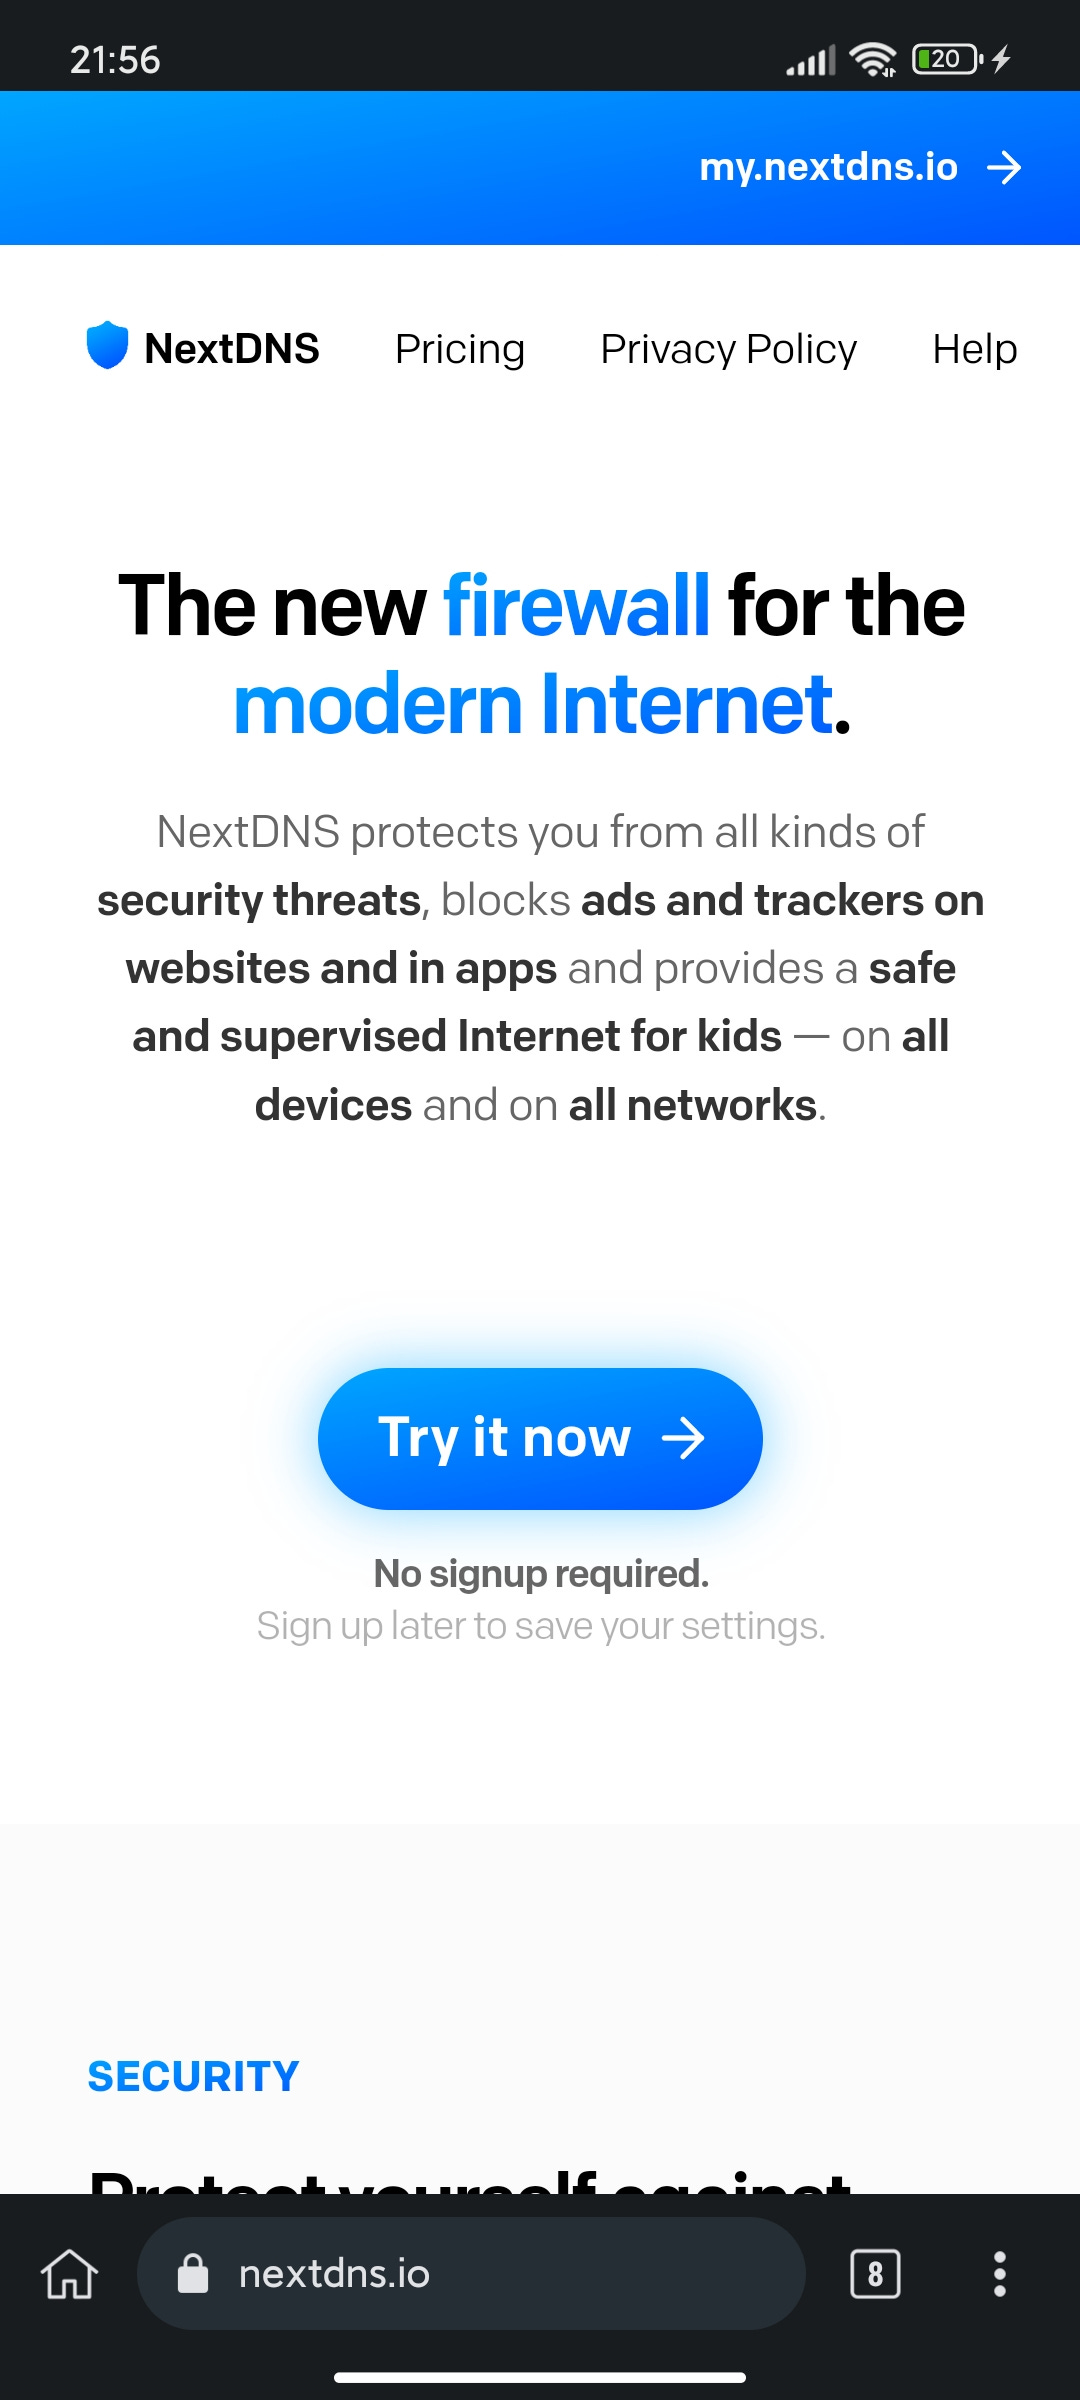
Since I already have an account, and I want to show the process for a new user, I will be using the feature where you can try it without an account for 7 days.
Anyways, once you've done either method, we can proceed to the next step which involves linking up all your devices.
Step 2: Link all your devices
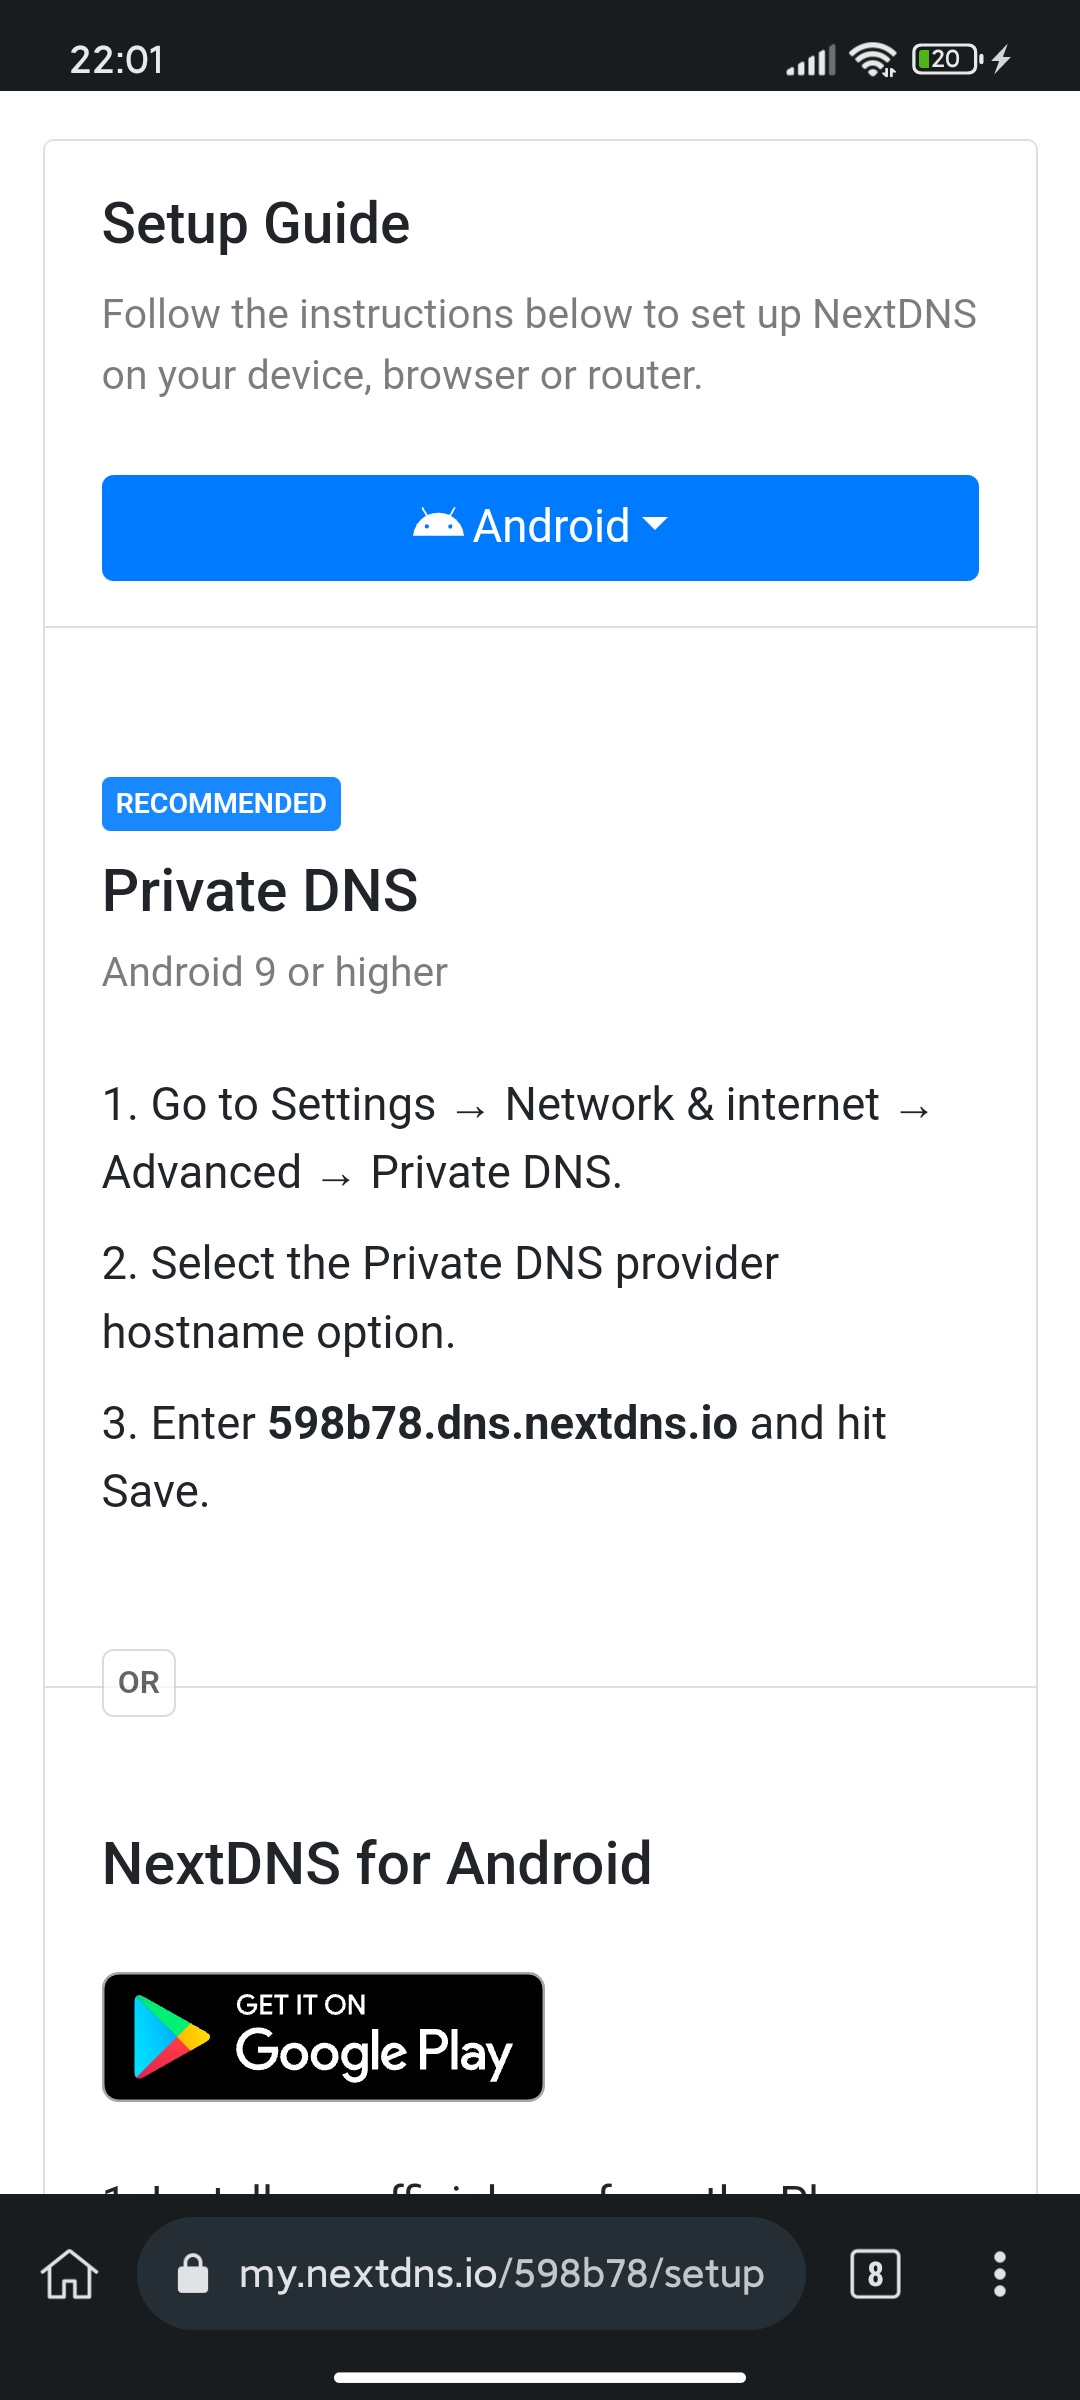
On the NextDNS dashboard, we are greeted with a setup guide for multiple different device types, usually it should be on the device that you're browsing from, for example it automatically detected I was using an Android device (please note not all devices running Android 9 or newer support private DNS, despite what the page states).
Follow the instructions, and hopefully you'll be running the DNS on your device.
You can click the drop-down for other devices. If it’s not listed, you’ll need to scroll up to the linked IP section, and link your IP address. It does mean that if you use multiple different IPs, you may struggle with using this.
Anyways, once you've linked your IP, you can link the IPv4 addresses listed above on your devices. If you're not sure how to change your DNS on your device, try checking the guide that I made for AdGuard DNS (https://experiencersinternational.github.io/labs/techtips/software/enableadblockingoneverydevice), but replace the DNS used here with the NextDNS ones.
Before adding filters, we're going to do some additional stuff in settings, which I'd recommend doing.
Look at the tabs on the website and go to Settings (it's at the end).
First of all, for security and privacy reasons, change the retention statistics to 1 month and store it on a server based in Switzerland, and not the default which is the United States.
The next thing I'd do would be to enable the block page. By enabling the block page, it makes it more apparent that a site has been blocked (and isn't just having issues). For this to function correctly, you'll need to install a certificate file which you can get at https://nextdns.io/ca. NextDNS has a guide to install it at https://help.nextdns.io/t/g9hmv0a/how-to-install-and-trust-nextdns-root-ca. If you want to see this in action, I've attached an example of blocking a certain metaverse company using NextDNS.
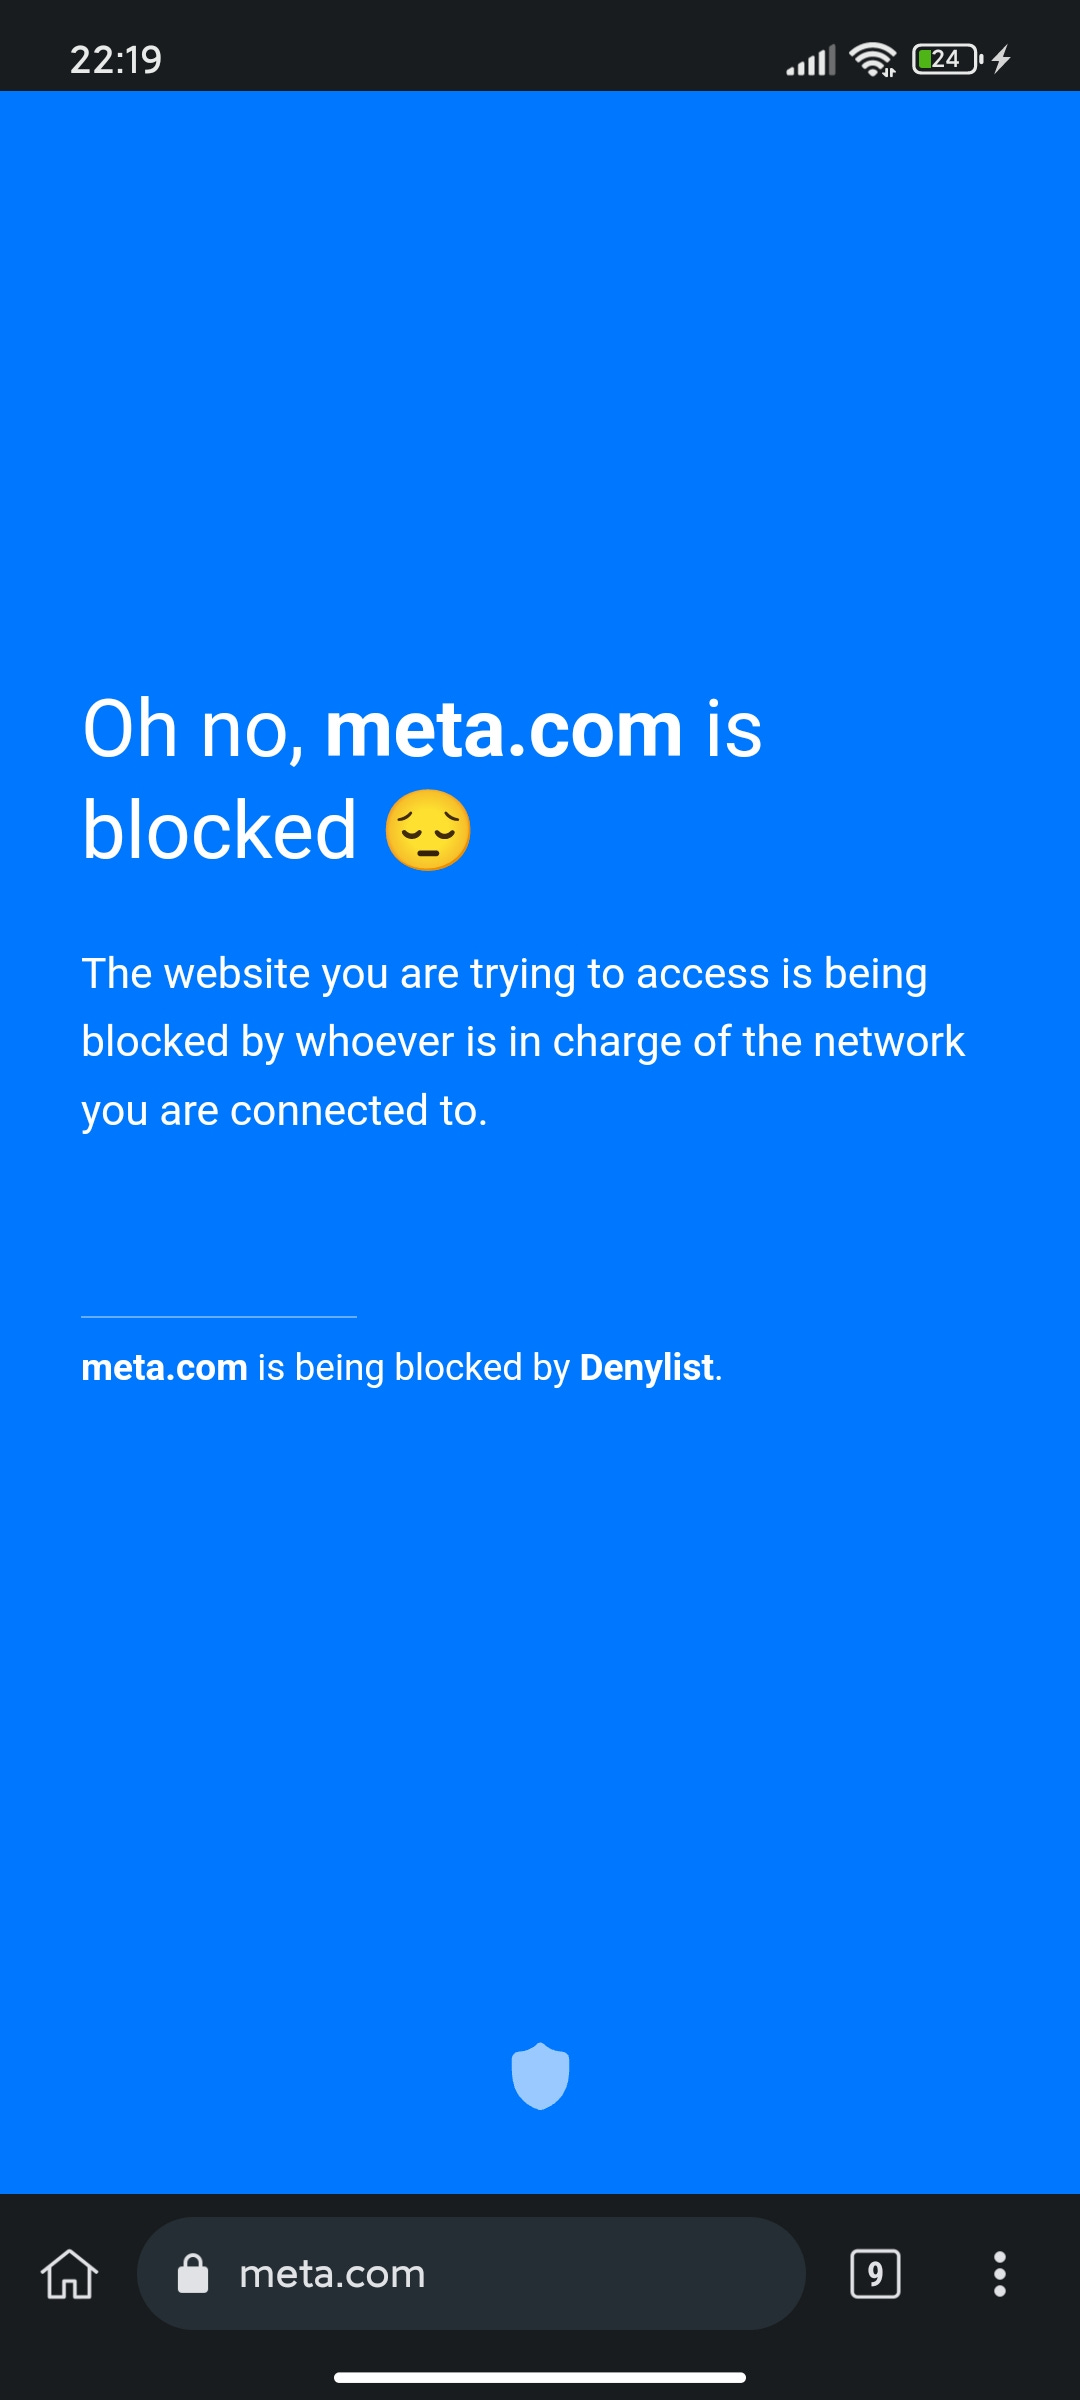
It’s much clearer than the generic error messages you’ll get otherwise.
Finally, if you want someone to have read-only or edit access, make sure to add someone in the invites section. I won't be doing this since I only use my DNS settings on two devices.
Now we can move onto Step 3.
Step 3: Start blocking
By default, NextDNS only uses a few blocklists, such as Google Safe Browsing and NextDNS's Advertisement and Tracker Blocklist. In this step, we'll be expanding our blocklists to block more items.
First of all, we're going to head into the Security tab and enable AI driven threat detection. This will allow for NextDNS to block sketchy sites in real time using artificial intelligence.

The next thing I'd recommend doing is turning on DNS rebinding protection, this is supposed to prevent attackers from taking control of local devices. It's in the same tab as the last one, so just scroll down.
After that, scroll down yet again and disable newly registered domains. This will block domains that have been registered in the last 30 days, which could do a great job at protecting you. In my experience, this hasn't really caused me too many issues.
The last thing to do for the security tab, scroll down to block top level domains. I've personally added two TLDs to mine, particularly .ZIP and .MOV, which were recently registered by Google Domains. Oh wait, Google decided they were going to axe Google Domains a month after they caused chaos with these two TLDs, so technically I mean Squarespace. Scroll through and add any TLDs you might find sketchy. Please note that some of them are held by companies, for example Google owns .google and the television company ITV owns .itv.
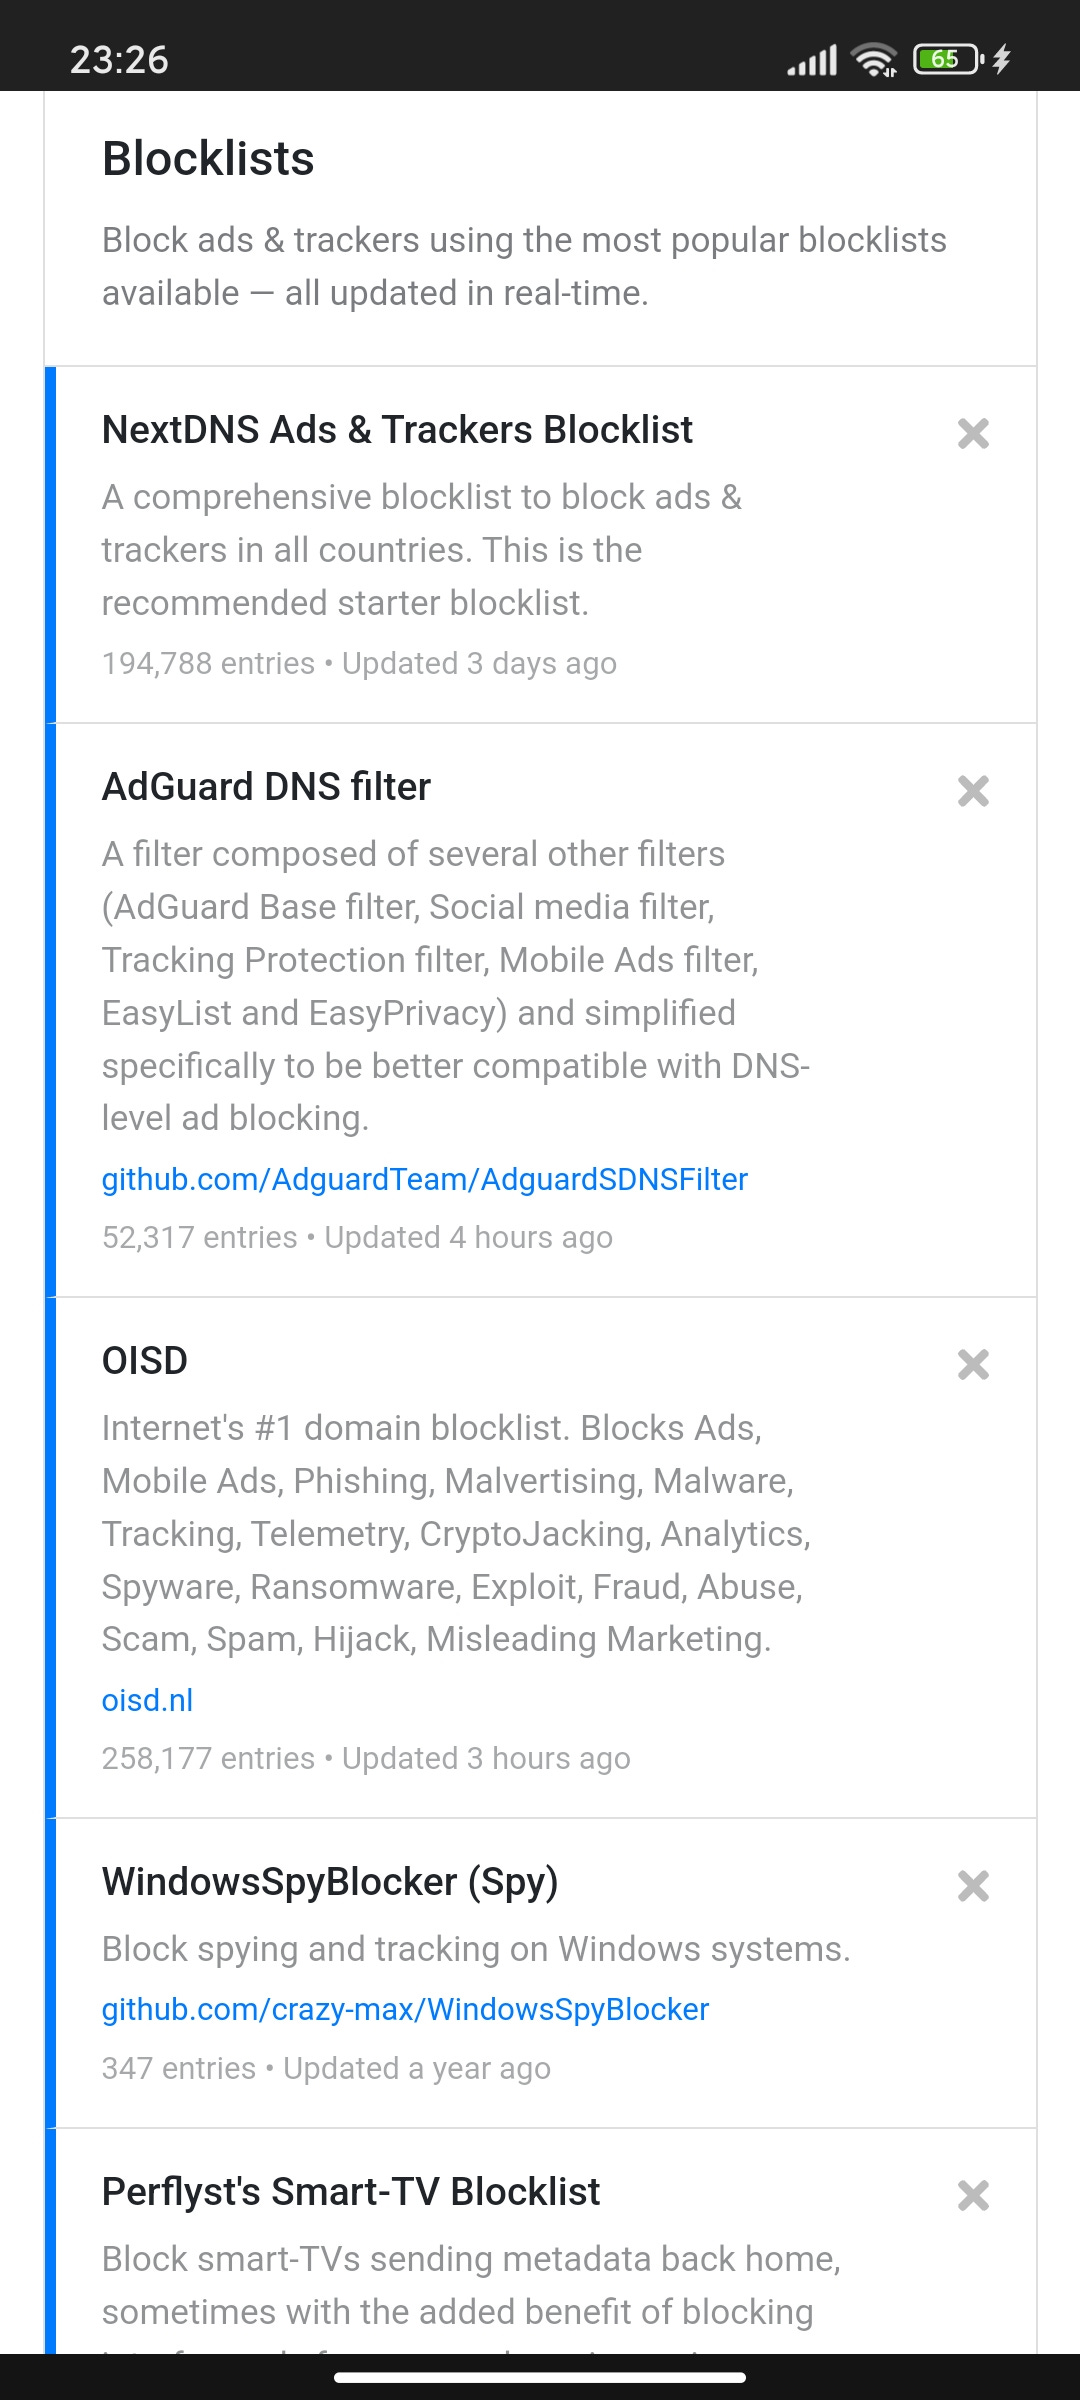
Our next tab to visit is the Privacy tab. In Blocklists, press add a blocklist, we're going to add a few here. I've personally added AdGuard DNS filter, OISD, Windows Spy Blocker and Smart-TV Blocklist.
Scroll down a bit to native tracking protection and add any manufacturers that you need to.
Let's move onto the next tab, Parental Control. Despite the name, I'd still recommend looking through here, as you can apply restrictions for certain websites (such as Facebook or ChatGPT) which can block you from accessing that site completely, or you can only access it at a certain time. I wouldn't necessarily say that this is perfect, as for example the Mastodon filter most likely relies on API data from joinmastodon.org (I'm using this based on information about AdGuard's Mastodon filter).
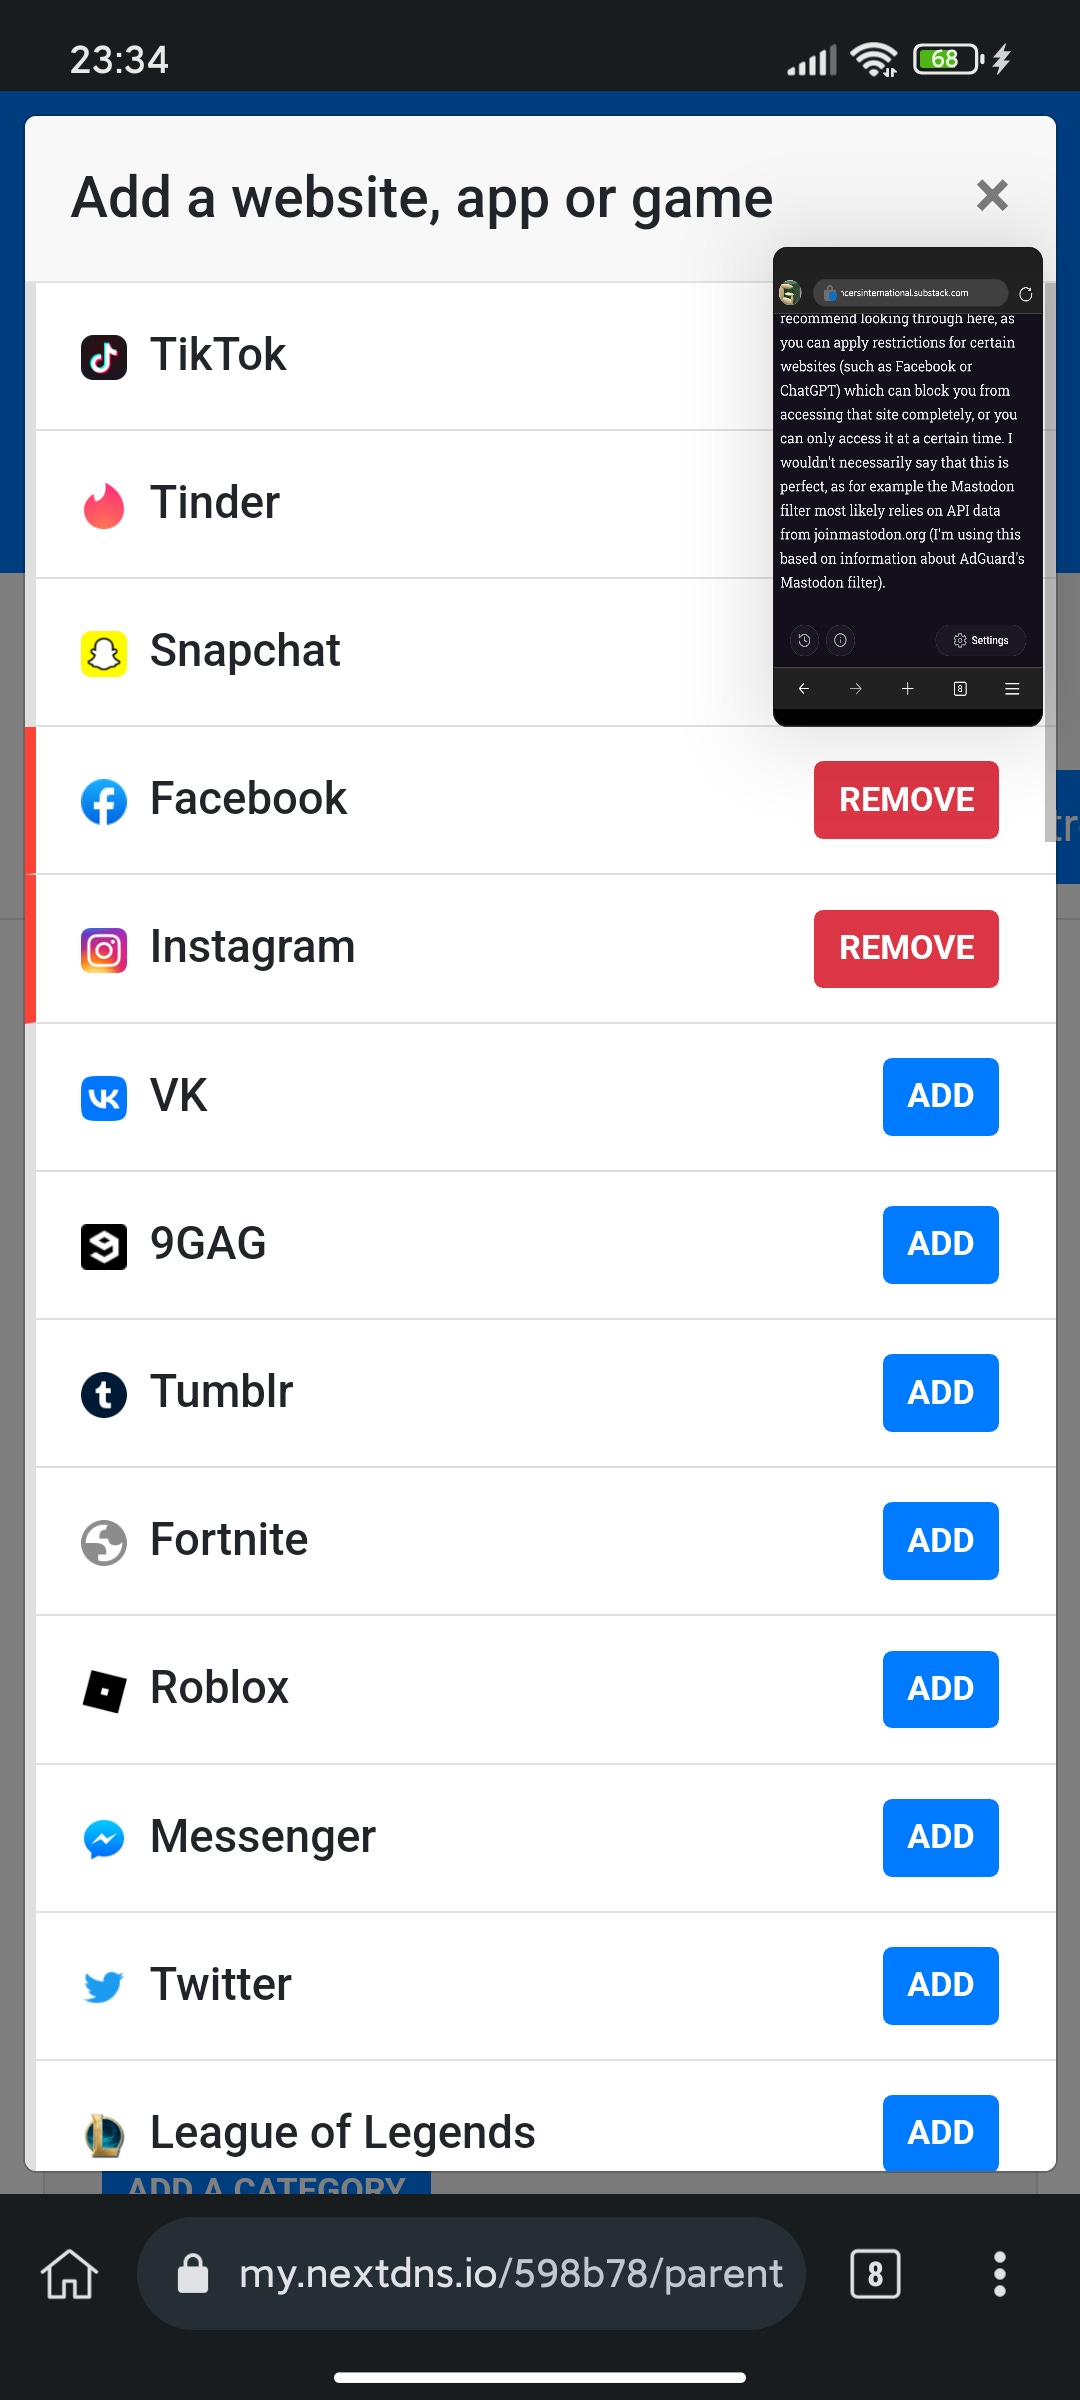
If you'd like to filter by category, it's directly below filtering certain websites. Category filters allow you to block porn, dating and piracy sites, along with a few other categories.
If you want to, there are options below this to enable SafeSearch or YouTube Restricted Mode, but for most people, it isn't needed unless you're setting up filters for a kid.
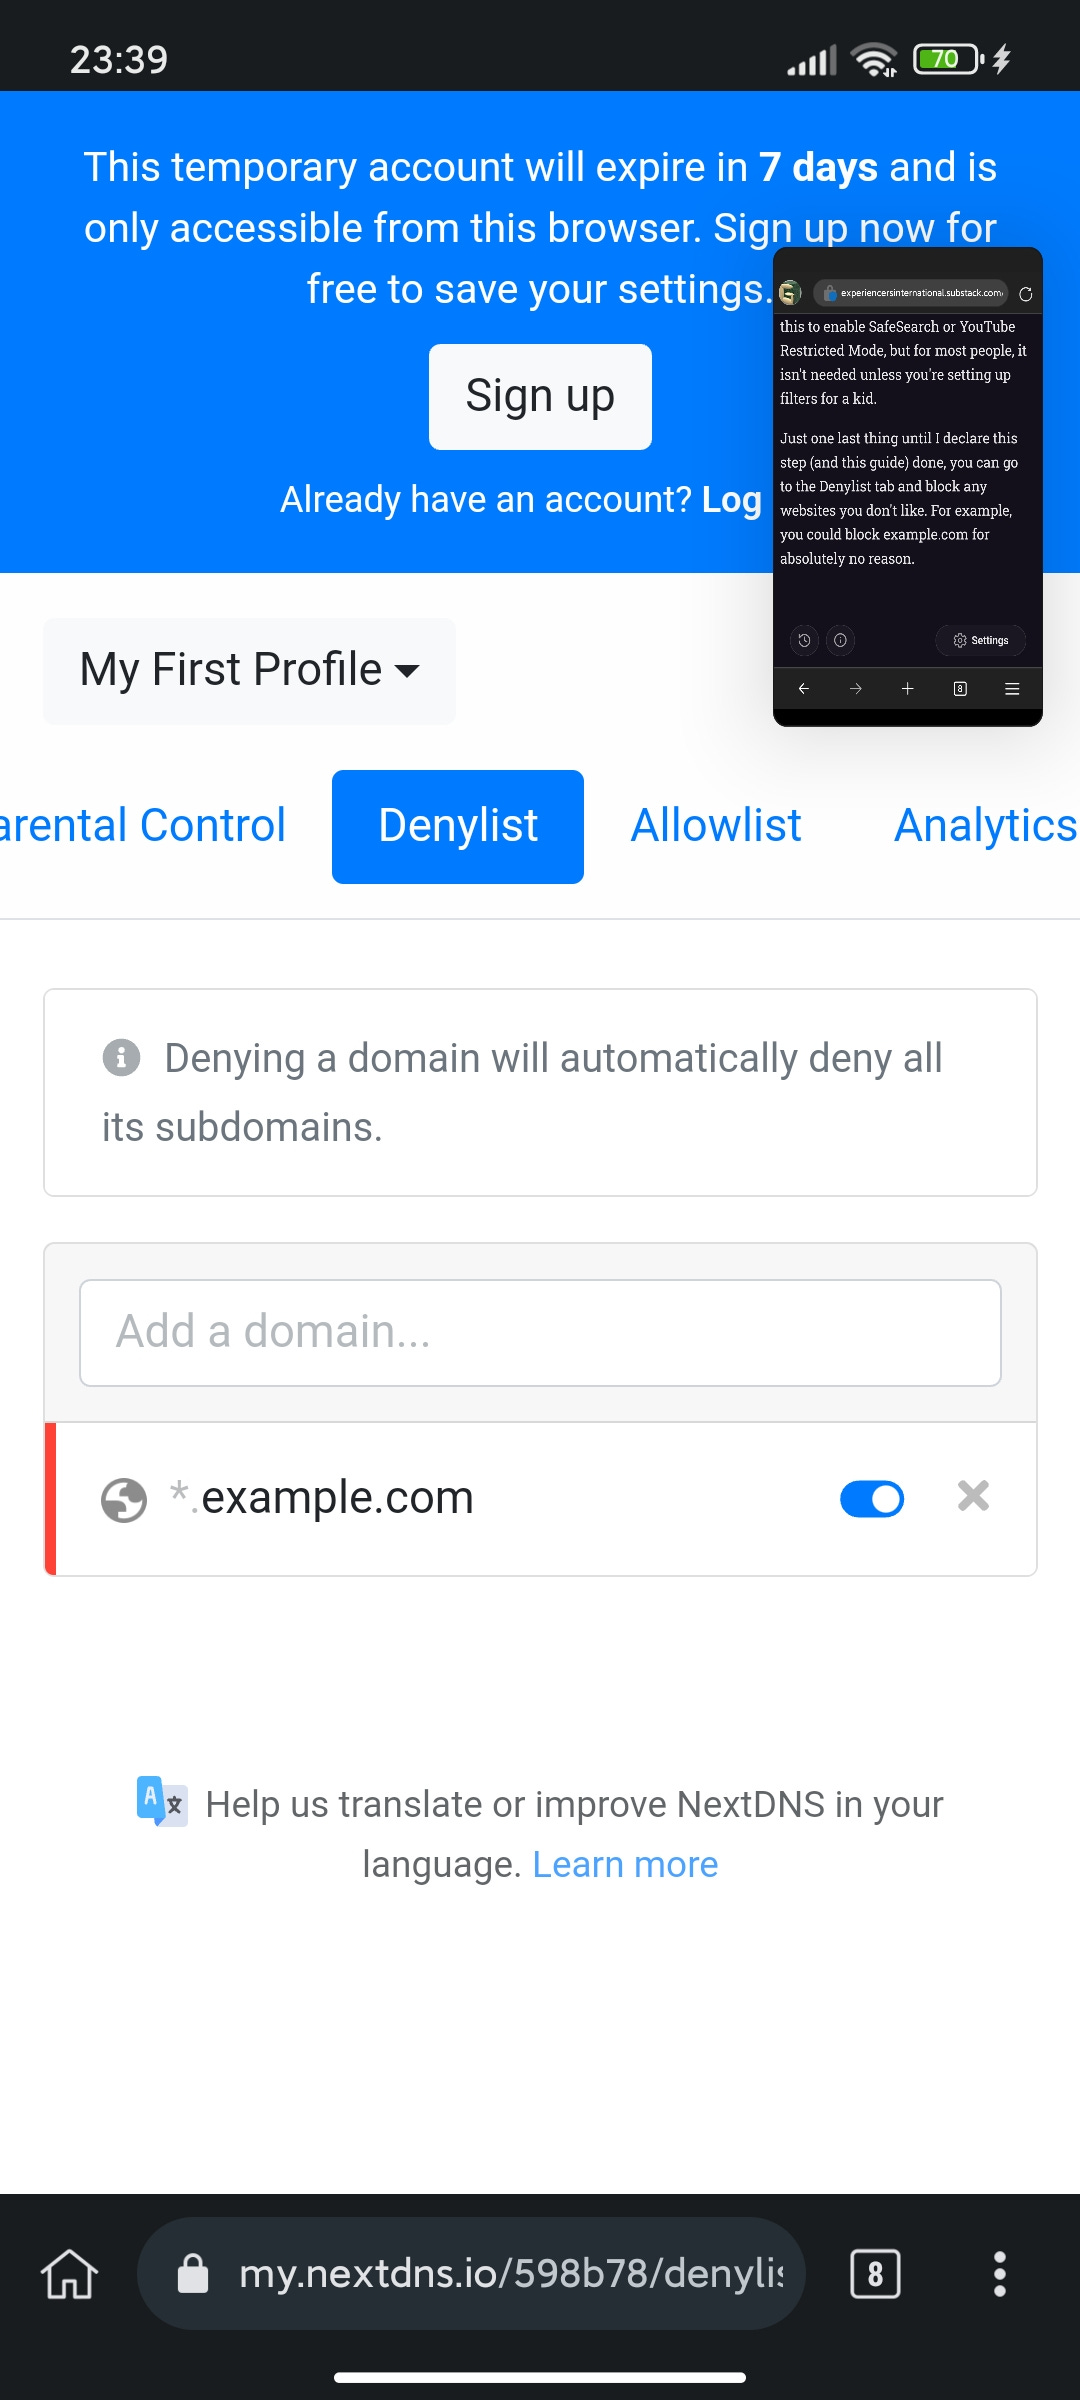
Just one last thing until I declare this step (and this guide) done, you can go to the Denylist tab and block any websites you don't like. For example, you could block example.com for absolutely no reason.
Conclusion
In this guide, you have just set up your own DNS server that is able to block advertisements, trackers and to block bad content. If this helped you, consider sharing with a friend. Thank you for reading!